Friday, December 30, 2011

The Next Frontier....

The next frontier is vinyl plank flooring. 800 sq. feet of it through out the upstairs and in the living room downstairs. 


As I'm writing this, we've done maybe 80 sq. feet. Probably not. Oh mylanta it's back breaking work. We ripped up half the carpet in the mancave, and then Rob got excited and laid down some flooring so we can get a feel for it. This isn't going to be a quick project going by our current state of progress! 


Plus, the old carpets are stinky, and have sharp bits in them. Rob's done most of the work. I mainly roll up the carpet and tie it in bundles :)


It makes a big impact though. So far we're loving the vinyl flooring. So much easier to install than laminate, plus it'll be waterproof... which is good for our moisture loving house. And it's sexy. 


Meow! We were planning on waiting til our income tax returns in 2012, but while stalking Lowes 2 days ago I found that the "gunstock" Armstrong vinyl planks were on sale from $1.74 to 99cents. The employee we asked said it wasn't a sale, it was a misprice and that they're fixing it next week. So we jumped on it and charged all $782 of it to our Lowes card with a 10% off coupon we had saved up. The "sale" prices saved us $600 from what we were expecting to pay! Wahoo!


Plainly my awful phone pics give you an accurate idea of how it looks ;) Better pics later... and some updates after this New Years weekend. Be safe y'all and enjoy your black eyed peas!


Wednesday, December 28, 2011

My Favorite Projects

I only started the blog back in July, but I think I've done a few noteworthy things since then. A little run through of my top 10 favorite moments on the blog will be a fun review and will help out any new readers I've gained since July too! In chronological order...

1.) The Dining Table (click for the link)


$25 Table found at Restore. We sanded the body down, oiled the top and painted the base Honeymilk by Valspar. We use it every day, it's my favorite project to date. 


$4.50 at Goodwill. It's not my favorite. I still don't love it with our furniture, but, it is a lovely piece by itself (although it needs another oiling bad). I sanded the bad chipped finish off and sealed it with Watco Danish oil in Medium Walnut. 


$15 find from Goodwill. We primed it then painted it New Black by Valspar. And then I decided that I hated Valspar paint because it has paint boogers. Anyways. We use this every day, the paint has held up fantastically. 


$450 :( Ouch. But, it was necessary. Oh, and we also bought the house we put siding on :) That cost a LOT more than just $450 ;) 

5.) Winning the scariest award, The Discovery of Timmantha! (click for the link)


Oh, and she's still there, chilling in the well. :)

6.) Winning the best deal ever award, The Black Bed (click here for the link) 


$40 from Goodwill, king sized. We love it. We get so many complements on it. 


$40 from Restore. Not cheap for Restore but it came with a matching mirror that I have revamped and put elsewhere (more details when Rob actually hangs it for me, slacker!) This dresser is int he guest room right now. 


We zoomed through building this room in time for Rob's parents to visit and showed the steps to do so quickly for yourself if you're ever in a time crunch too! It was on the cheap too (of course!) ;)


We spend $30 and $50 on new lighting for the kitchen at Ikea! They changed the whole feel of the rooms. 


So anyway, those were my favorites. Here's to 2012 being even more action packed! 


Linking to: 


- Southern hospitality


Monday, December 26, 2011

Very Happy Weekend

Wow. It has been such a mad rush around here. Every year I help my Nana throw a triple Christmas for my large and barely related but loved nonetheless family. This year was no different and I didn't have one spare minute to even wish you all Merry Christmas. Sorry, but I've been having a ball. Christmas is my favorite time of year. I am such a home body. Spending time with my huge family all thrown in together is SO much more fun then friends could ever be ;) My Nana always makes each year exciting and unique. She is a super woman, especially with her poor health recently (although Mayo is on it's way this winter!).


We cooked so much food, the best of which was our two 20 lb hams! We splashed out and got a Clifty Farms country ham and a Paula Deen spiral this year. I prepared the country ham. It was my first time...  


Lets just say I didn't realize you had to clean the ham of all it's slime before hand! That thing was slippery!! 


I think my sides are still aching from all the laughter we had! My favorite part was my dirty santa gift. I wrapped up a fancy egyptian cotton towel set from Lands End... and put a "log" of poop soap on it... with corn. My uncle LOVED it. He's such a nut -- we all try and trick each other. 


I also scored tons of good stuff. Like a Brother CS6000i sewing machine. It is gorgeously beautiful and terrifying at the same time. I WILL be a sewing goddess though. 


My biggest hope is to churn out a quilt like Newly Woodwards does! I love her bunting quilts :) I've read all the amazon reviews (all 765 of them... I might be exaggerating) and they all praise it so woohoo!!


She got a killer deal on it. It's normally about $450, but she got it 70% off. I can't wait. I am so excited and I am halfway through the manual on it already! 


My Rob got me some fun toys too:


- a new black Wii and controllers
- Zelda game (dork)
- SUPER MARIO BROTHERS
- Complete set of Harry Potter movies

I also got some lovely new clothes, a gorgeous white leaf scarf, toms, and tons of gift cards. Rob got snazzy RL winter clothes, some xbox stuff, a yoda alarm clock, a model plane, etc. We were into the toys this year! Even better than my gifts were the gifts I gave my family. I was very proud of how thoughtful most of them were this year: a new coat for both my mom and dad who are both struggling to stay warm, a kitchen utensil my Nana has been searching for for MONTHS, a hand painted metal owl for my cousin who loves owls, and a new backpack set for my sister who I learned hasn't had a backpack all year!! I feel all warm and cozy just remembering it all. We were very blessed this weekend!! I'm hoping everyone else was too and that your Christmas was equally wonderful. Here's to waiting 364 days for next year!! :) 


Wednesday, December 21, 2011

I am Loved.

My aunt gave Rob and I her old hutch this weekend. No one else in the family wanted it?!


We put it in the black hole we had behind the couch. It seems to fit in there nicely. 


I do need to get a smaller side table for between the couches now. It looks a bit tight right there but really, there is plenty of space. It's just so dang huge it feels like it needs its own football field of space!


It's 100% pecan, and it's solid as a rock. Poor Rob had to get 3 other guys to help lift it-- the top and the bottom are separate... so he needed 4 total guys to help lift just the bottom and then just the top. That should tell you how HEAVY it was! We probably need to like reinforce the floor under it or something.

(striped jammies alert!)

I can't decide if I want to paint it or not. It's got that speckled marine varnish stuff on it that our dining room table had. I hate that. But, I do like the extra dose of wood in the room. Maybe once we put down wood floors it'll tempt me to paint it? Honestly I DO want to paint it... but oh mylanta that'd be SO much work!!! 


Having the hutch there also helps break up that huge expanse of wall we had going on. Now I can hang up two large frames over the couch and just call it done! 

Oh and here's a little before and after of the black hole behind the couch. 


Anyways, I love it, even with its flaws. Mainly because it'll outlast me with it's hulking-ness. Thanks Ma (what I call my aunt!)


Monday, December 19, 2011

Non Fragile Stockings

Last weekend I was reading my blog list and sighing over the cute stockings everyone has hanging on their christmas-fied mantles. But here in podunk Kentucky all the stockings I can easily shop for are ugly, cheap, and/or flannel. So, we decided to make our own. Like, hand sew those bad boys.


Badass.

Honestly Rob is the one who persuaded me to hand sew. We each sewed our own stockings, and it really only took about an hour or two for each. I was expecting days of sewing! Plus, they turned out much better than we were expecting-- they're BIG too! 

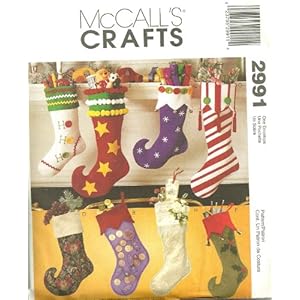
We used a paper pattern we got from Walmart that cost $2.50, it is similar to this one:


Then we opened up the pattern packet in Walmart to see what measurements and supplies we needed. They're fairly simple to make, we skipped a lot of steps that the pattern wanted us to do since we bought such a thick fabric for the liner, so I'll do a quick tutorial if you're interested! 

According to our pattern, we each got 5/8 of a yard of red broadcloth for the outer, and 5/8 yard of white quilted cotton for the inside liner and cuff. 5/8 of a yard was generous too, we had plenty of leftover fabric so if we had messed up we probably could have pieced together another stocking from the scraps. If you get quilted fabric like we did then you don't have to line the inside of the stocking because the quilted fabric is so thick anyways. We just had the thin red broadcloth as the outside layer and then the white quilted fabric as the inner. 


So you cut out both your inner fabric and your outer fabric. Cut out two of each so that you have four pieces total.


Then you place the two outside fabrics face to face (the red broadcloth), and place the two inside fabrics on the outside, faces out (the white quilted cotton). Like you sandwich the red with the white fabric. You are sewing it inside out, then you'll flip it rightways out when you're done. The pattern has good instructions for this part with handy drawings to help.


Stitch along the outside edge (about 1/4 in. from the edge) using a straight stitch. We doubled up our thread too for maximum present supporting in the future. 


Leave extra room around the corners because you'll need to snip triangles out of the fabric to ensure that it lays nicely when you fold it right side out. I didn't take a picture of that step though because I was too excited. Here is someone elses picture:


 And when you fold it right side out, you'll have the beginnings of a stocking!


Next you cut the fabric out for the cuff. You only need two pieces of the quilted fabric for this bit, no red! Again, use the paper pattern given to you. The pattern explains how to sew the two cuff pieces together and fold it. You tuck the stocking strap in between the cuff and the stocking. This part was so confusing to me that we had to go visit my Nana and have her explain it to us so I don't have pictures of any of this. There's also multiple ways to do this and you can't really mess up since the cuff hides all the sins of your sewing.

But, when the cuff is sewed, you use a blanket stitch to secure it to your stocking you already sewed. 


The cuff hides the stitching, and the inside of the stocking looks fairly seamless. 


 Sorry, I know this is a bit confusing. I am not so savvy with sewing terminology! But in the end you have a finished stocking. We then added some ruffles and buttons to ours to make them different from each other.


But we didn't want to mess up the stockings we'd worked so hard on!


So I hot glued the buttons to Rob's...


 And pinned the ruffles to mine. Now we can change our minds in the future/yearly! :)


We don't have a very ideal place to put them so for now they're hanging in the stairway. I wanted to put some garland on the railing but there is no use putting makeup on a pig! That stairwell is just awful. 


I had a lot of fun picking out the fabric for these, you could definitely copy Pottery Barn velvet ones or some such. Ours only cost us $2.50 for the pattern, ~$3 for the broadcloth, and ~$6 for the quilted cotton. $12 isn't bad for 2 stockings! And I'm hoping these will last us many years to come!

Friday, December 16, 2011

Kill the Flies!

I had something else planned for today on our new stockings that we HAND STITCHED (shock and awe), but I've been too busy to snap pictures of them completed so instead, you all can watch a video I took on my phone of Rob helping Loki catch some flies. The funny thing is that Loki was totally cool with it and plainly appreciated the help in getting that damn fly!! ;)


Also there are some sneak peeks in that video of the mancave newly painted and decorated. It's been 90% complete for a few weeks now, but the other 10% took a while because we ran out of tape. Then we got lazy. I don't like to do the whole big reveal, keep everyone in the dark, thing but it looked stupid.... oh okay. I got paint all over the baseboards and took forever to repaint them. You all would have thought a 5 year old painted it! EFFORT to fix it! ;)

Anyways, Loki is growing like a weed. Hopefully soon we can start training him to go outside. Personally I get annoyed with smelling cat smells in my house!

Wednesday, December 14, 2011

Screw Christmas, More Chalkboard!

Y'all, I feel awful today. I've got a bad sinus infection and sitting in bed staring at my laptop all day when I could have been earning money for presents that I still can't afford to buy yet has been HARD.
I finished my long term sub position last week but because of the weird pay schedule I won't see any of that money til a few days AFTER christmas. Which just sucks. Plus, my nose is raw.

Oh well, enough whining. Rob and I have a lot of backed up projects to share and I am feeling a bit sick of Christmas today since I can't afford it this year, SO I'm going to break up the Christmas related posts and stick in a random chalkboard project I did last weekend :)

Remember this ugly picture I got at Goodwill for $3.50 (link here)?


I have no clue why someone would want an aerial shot of a farm? I decided to make it into a chalkboard instead.


This was a total bitch to hang. It came without any hardware so Rob had to put in the tiny eye hole things in the back by hand. It involved a lot of cussing and anger on his part since the frame is like solid oak and it kept snapping the hardware in half!! :)


I have a strong love for glossy lipstick red. I try to stay away from it generally though since I don't like any other tone of red. But I liked the way Martha Stewert sells the aqua and red kitchen stuff so I decided to do the same in my kitchen. The red should look nice against the color we're planning on painting the walls.

Hence the red geometric dishtowel THAT ROB KEEPS WIPING HIS HANDS ON EVEN THOUGH ITS JUST A PRETTY. Whew. Boys.


I like the way chalkboards look when you're preparing them. So suessical.


The chalkboard part was easy. The frame was a happy accident... I originally bought a small bottle of enamel red paint meant to go on metal to tweak the ugly chandy that was in the kitchen... but we ended up buying the pendant from ikea instead. So I used the enamel metal paint on the wood frame instead and instead of covering it, it went on so thinly that it looked like a red stain. I liked it. A lot!


Now our kitchen no longer has such a blank and sad wall. That little giraffe on the floor is Loki's FAVORITE toy by the way. We have to hide it every few days because he's totally wild when he plays with it. It must make him believe he's a lion in the Serengeti.